Solar Geyser South Africa DIY Installation Guide
This solar geyser South Africa installation guide provides a great DIY alternative to your electric geyser, which is what many people in South Africa are desperate for in light of frequent load shedding and mounting electricity costs.
Unsurprisingly, one of the most obvious cheaper energy sources is solar power which, is plentiful in South Africa, and can be used to power your own solar geyser for free.
Furthermore, you’ll find that your home’s geyser is one of the biggest electricity consumers out of all the electric appliances in your house, so by using a solar geyser (instead of electricity) you will not only save a lot of money, but you won’t be bothered by load shedding either.
Therefore, anyone not considering a solar geyser installation in South Africa must be crazy when you consider the potential electricity & money savings you will realise as well as the satisfaction of not having to be totally dependent on Eskom.
Want To Produce Your Own Clean, Renewable Energy For Your Home Cheaply?
7 Steps For a Successful Solar Geyser Installation
Please note that all homes are different which means that these solar geyser diagrams & installation steps should only be used as a rough guide.
Furthermore, solar geyser suppliers in South Africa may consist of different components and variable installation methods.
- Fixing the Solar Collectors To the Roof
Try to minimise the amount of holes you make when mounting the collectors as there will be less risk of leaking despite sealing all the hole penetrations with silicone sealant.
If possible, you can run the piping along a vertical wall instead of going through the roof with the collectors mounted on the roof.
The collectors need to be secured to the rafters, so it’s easier to drill a small hole up from next to the rafter to locate the mounting point on the roof and then seal the locating hole once the collector is fastened to the roof.
You’ll probably get detailed instructions from the solar geyser manufacturer regarding this.
- Installing the Storage Tank For the Solar Geyser
The next step is to install and place the storage tank and heat exchanger next to the conventional water heater.
Also, ensure that the glycol fluid loop connections to the heat exchanger and the cold and hot water connections are easily accessible.
Glycol is a commonly used heat transfer fluid used in solar heating systems.
Should the heat exchanger be external to the storage tank, it’s probably supported by the existing plumbing.
Then the unions at the storage tank and heat exchanger connections need to be installed so that the piping will not have to be cut if the tank or heat exchanger ever needs replacing.
Install the Piping and Pump
This step involves installing the piping for the glycol loop and only solder it in place once the entire loop has been assembled in case it needs to be moved or adjusted.
It’s good practice to install unions at the pump to avoid having to cut the piping if it needs replacing in the future.
Ensure that the pump outlet, which should be positioned at the lowest part of the loop, is plumbed to the piping leading to the solar collectors on the roof.
Furthermore, a safety check valve must be installed at the outlet of the pump so that when the pump is turned off, the glycol will not flow backwards around the loop.
A pressure gauge, a pressure relief valve as well as an expansion tank need to be installed, most of which should come with your solar geyser kit (see below).
- Installing the Piping
The piping needs to be plumbed into the solar water heater to allow the cold water to flow to the inlet of the solar storage tank, and the outlet of the solar storage tank to the inlet of the conventional water heater.Valves and unions on the inlets and outlets of the tanks also need to be installed.
If you have a heat exchanger that is separate from the solar storage tank, you can have a natural convection loop between the heat exchanger and the solar storage tank working on a gravity feed with a larger diameter pipe.
Otherwise you will need to have a pump installed to force water through the heat exchanger and tank.
- Installing the Controls
You can now install the differential controller that will sense the temperature difference between the water at the bottom of the solar storage tank and the glycol at the top of the solar collectors.
The sensors can be attached to the pipes with hose clamps.
- Fill the system
Once the system is filled with water, you will be able to check the glycol loop for leaks.
A fill pump will be required for this in order to provide enough pressure to pump the water up to the top of the solar collectors.
- Insulating the Water Piping and Glycol Lines
Once you’re sure there the solar heating system is not leaking, you can insulate all of the glycol and water lines with standard foam pipe insulation, whilst glycol piping and external heat exchangers should be insulated with fiberglass pipe insulation.The joints of the water piping can be insulated with duct tape and those sections that are exposed to the sun can be protected by a foil wrap, or UV resistant paint.
Basic Requirements To Install Your Solar Geyser
- An installation kit which may consist of the following items;
– Temperature & pressure relief valve is a safety valve that is set to a temperature of 80ºC & a pressure of 200 Kpa at which limits water will be released through the valve to prevent the geyser from bursting.
– 300 Kpa non-return pressure reducing valve.
– Vacuum breaker which prevents water from being siphoned back into the water system which could damage the solar geyser.
– Copper piping and connections.
– Tempering valve mixes the hot and cold water and regulates the temperature of the outlet water to a maximum of 50ºC.
– Element for heating water when the sun is down or on cloudy days when there aren’t sufficient sunrays to heat the solar geyser. - Installation Kit prices*;
– Retro fit (to existing geyser) installation kit: R3,500
– New installation kit for a 100L Solar Geyser: R8,000
– * these prices are estimates and will vary between solar geyser suppliers. - For a flat roof installation, a steel frame will be required.
- Tile roof hooks will be required if the solar geyser is installed on a tile roof.
- IBR or corrugated roof hooks will be required if the solar water heater is to be installed on an IBR or corrugated roof.
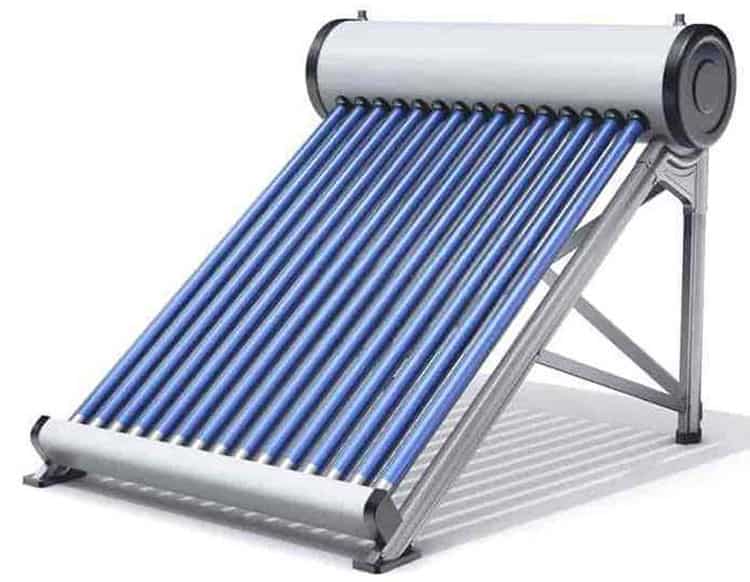
Solar Geyser Installation Diagram

7 Important Questions Before Starting Your Solar Geyser Installation
- How Does a Solar Geyser Work?
The energy contained in the sun’s rays provides the heating power necessary to heat the water in your solar geyser.
The water is heated up as it circulates through glass tubes or solar panels known as collectors – the heated water is then stored in the geyser for use in the house.
- Can the Existing Geyser be Used?
Yes your existing geyser can be used but it would have to have a collector connected to it.
It should be noted however, that a solar geyser is designed & manufactured specifically for this purpose as it is better insulated, works more efficiently with solar collectors & has a longer life.
- Does it Need to be Installed on the Roof?
The decision as to where it needs to be installed will depend on factors such as the pitch of the roof, the type of system that is used and whether the roof is capable of bearing the weight of the installed solar geyser system with water flowing through it.
So it is quite possible that the tank can in fact be installed inside your house’s roof but the installation would need to be assessed by a solar heating expert.
- Does the Roof Have Sufficient Un-Shaded Area?
The roof will need to be facing the the right way and not be in shade for large parts of the day
- Can the Roof Support the Weight Of the Solar Geyser?
The roof needs to be strong enough to support, not only the solar geyser & water, but also the workmen doing the installation.
- Is There Sufficient Space In the House For the Storage Tank and Associated Components?
Imagine starting the installation only to discover that there’s no place for the storage tank.
- Plan the Plumbing Layout First
Ensure that all the plumbing pipes can be installed between the storage tank and the collectors without having to remodel sections of your home.
5 Additional Points To Consider With Your Solar Geyser South Africa

- This solar geyser installation diagram will hopefully help you to DIY and save on professional geyser installation costs in South Africa.
- Furthermore, a new solar geyser installation allows you to install your solar hot water geyser directly to your water system and is suitable for low or high-pressure water conditions which eliminates the need for your traditional, electricity guzzling electrical geyser.
- Whilst having a professional install your solar geyser in South Africa would be a lot easier, it will cost you more money & will not necessarily be a better option than building & installing it yourself.
- It’s also worth noting that your solar water heater can be built with components that can be purchased fairly cheaply at your local hardware store.
- Whist Eskom was offering homeowners a rebate of between 15% to 20% on the cost of their solar geyser installation, this may have changed in later years.
So this additional saving is another significant incentive to get your solar water geyser installed – a saving in electricity consumption as well as an Eskom rebate, you can’t lose.
How Much Will a Solar Geyser Cost?